From packing smart to picking the right seat, small decisions can make a big difference. Knowing what to expect at check-in, how to navigate airport maps, and even how to keep nerves in check can help you travel with confidence. With the right tips, you’ll breeze through your first flight and actually enjoy the journey.
Preparing for Your First Flight
Arriving early increases your chances of stress-free check-in and boarding. Domestic flights typically require a 2-hour advance arrival, while international flights commonly recommend 3 hours. Lines at security or check-in can move slowly, so extra time helps you manage unexpected delays.
Checking in online streamlines your airport experience. Most airlines open online check-in 24 to 48 hours before departure. Completing this step lets you secure your seat and reduce wait times, especially during peak travel.
Weighing your bags at home avoids excess baggage fees at the airport. Airlines post specific limits—20 kg for checked bags and 7 kg for cabin bags are common examples. Knowing your weights saves you from last-minute surprises.
Reviewing your airline’s cabin baggage rules helps you pack correctly. Dimension and weight limits differ for carriers, ranging from 21 x 14 x 8 inches for many US airlines to smaller sizes for low-cost carriers. Sticking to these guidelines keeps you moving through security.
Setting up your internet connection before departure gives you access to boarding passes, maps, and entertainment during your trip. eSIMs and portable Wi-Fi options serve international travelers needing data at their destination.
Examining airport maps before you travel helps with navigation, particularly in larger hubs. Look for security areas, gates, lounges, and transfer routes on the airport’s website to get oriented.
Packing efficiently improves security screening and inflight comfort. Place liquids in a single quart-size plastic bag and follow the 3.4-ounce (100 ml) rule per container in the US and most international airports. Keep electronics and necessary documents accessible for inspection.
Planning your entertainment keeps you occupied during flights and delays. Download movies, books, or podcasts onto devices before leaving. Many airlines don’t offer free streaming, so having offline options ensures you’re covered.
Researching your destination prepares you for local customs, airport transfer options, weather, and possible entry requirements. Arriving informed makes the transition smoother once you land.
Dressing for rest enhances your comfort. Layers, loose-fitting clothes, and slip-on shoes protect you from temperature changes and streamline security checks.
Booking Your Flight and Checking In
Booking your flight requires attention to detail in ticket information and fare types. Double-check your name matches your government-issued ID exactly, as airlines apply this rule strictly. Examine fare types such as Basic Economy, Saver, or Standard—restrictions often include no carry-on allowance or pre-assigned seating. Confirm if your flight is direct or includes layovers; for connections, verify minimum connection times and airports.
Checking in for your flight gets smoother with online options. Most airlines open check-in 24 to 48 hours before departure through their website or mobile app. This option lets you select seats, add meal preferences, and sometimes reduces wait time at the airport. Print your boarding pass or save a digital version on your mobile device.
Arrive at the airport with your check-in completed and documents organized. For domestic journeys, arrive at least 2 hours before departure; for international flights, allow 3 hours. At check-in counters, present your ID, printed or digital boarding pass, and checked bags.
Weigh your bags at home to avoid excess baggage fees at check-in. Each airline’s cabin bag rules differ—review their guidelines to confirm size and weight limits. Adhere to liquid restrictions for carry-ons, packing containers of 3.4 ounces (100 ml) or less in a quart-sized zip-top bag for security screening.
Keep your travel documents, boarding pass, and ID easily accessible after check-in. These streamline security procedures and boarding. If you haven’t checked in online, head to the airline desk or self-service kiosk at the airport after arrival.
Choosing the Right Travel Bag
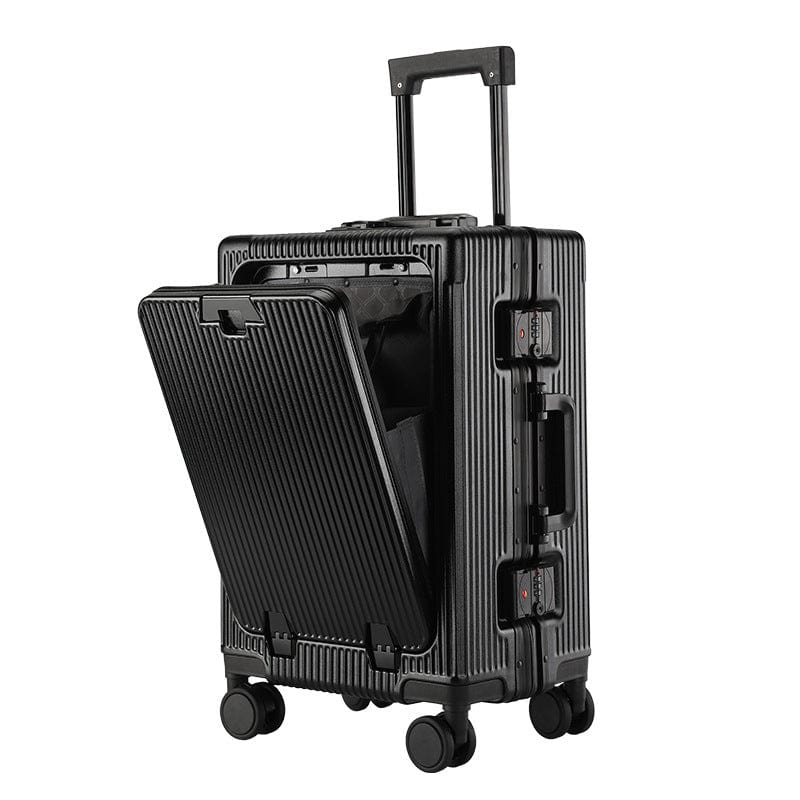
Select the right travel bag by matching airline size restrictions and your packing needs. Cabin bag rules vary across airlines—some allow one personal item and one carry-on, while others restrict you to only one piece. Measure your bag’s dimensions before packing since most airlines set maximum hand luggage limits at 22 x 14 x 9 inches.
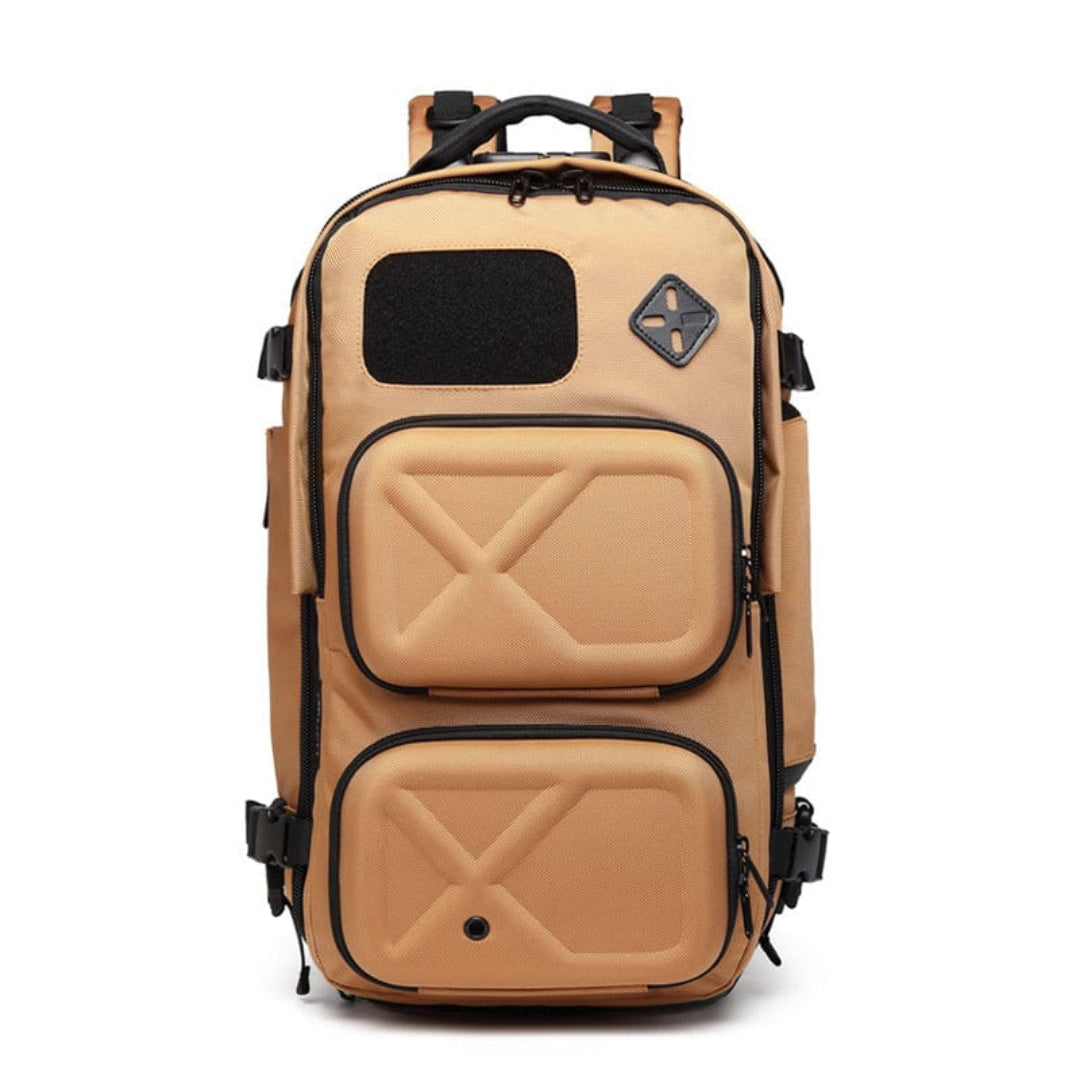
Pick lightweight bags with sturdy wheels and robust handles to move easily through long airport corridors and crowded security lines. Hardshell bags protect fragile items, while softside options provide flexibility and extra pockets, useful for quick access to essentials like travel documents and snacks.
Pack valuables—laptops, chargers, necessary medication, contacts, and a change of clothes—in your carry-on, since checked luggage can be delayed or lost. Check your airline’s website for current rules and prohibited items to avoid last-minute repacking at the check-in counter.
Opt for bags with built-in charging ports or compartments for organization, since these features help you stay connected and keep items accessible. Use packing cubes or small pouches in your travel bag for efficient organization and faster security checks.
Research destination weather and length of stay before deciding between a backpack, rolling suitcase, or duffel bag. Short trips with minimal changes of clothing best fit in a small rolling case, while international flights or multi-destination itineraries may require a checked suitcase and well-organized carry-on.
Essential Packing Tips
Organize your packing for first-time flying by following airline rules and keeping security checks hassle-free. Airlines impose carry-on and checked bag size and weight limits—examples include maximum cabin bag dimensions and total allowed weight. Verify these on your airline’s website before departure.
Sort your belongings by essentials and non-essentials to simplify the security process. Place electronics and liquids in an accessible spot within your bag, as security often requests separate screening for devices and liquid items. Prepare liquids according to the 3-1-1 rule for carry-ons: up to 3.4 oz (100 mL) bottles, held in a single quart-sized clear zip-top bag—1 bag per passenger.
Pack enough clothes for your trip’s duration after researching your destination’s weather. Limit clothing volume by choosing versatile, layered outfits and rolling garments rather than folding. Bring a spare set in your carry-on in case your checked bag is delayed.
Include health and comfort items like medications, snacks, and travel pillows in your carry-on. For international flights, pack copies of prescriptions and any required travel documents.
Secure valuables—examples include passports, wallets, electronics—in your carry-on instead of checked luggage, reducing risk if your bag goes missing. Place chargers, headphones, and entertainment (e.g., books, devices) within reach to keep you comfortable throughout the flight.
Double-check your airline’s banned items list to avoid delays at security. If flying with gifts, leave them unwrapped for easier inspection. Attach identifying tags with your contact information to each bag for faster retrieval if lost.
Review your packing with a checklist, verifying all items before you leave for the airport. This preparation helps streamline your journey and minimizes stress from forgotten essentials.
Managing Travel Documents
Keep travel documents organized before entering the airport. You’ll need your passport for all international flights, and some destinations require at least six months’ validity beyond your travel dates. For domestic flights, a government-issued ID such as a driver’s license or state ID card is necessary.
Store boarding passes, passports, and visas together in a secure, easily accessible pouch. Check if your airline allows electronic boarding passes, which reduces paper use and streamlines your process at security and boarding gates.
Double-check visa requirements for your destination using official government sites, as some countries require an approved visa before arrival. Bring printed copies of reservation details and any additional travel authorizations, like eTA or ESTA, if traveling to locations that accept electronic travel permissions.
Present documents at each checkpoint—check-in, security, and boarding. Security staff may inspect additional paperwork, such as proof of return ticket or travel insurance, so keep spares in digital and printed formats.
Monitor document expiration dates monthly and set reminders in your phone for upcoming renewals. Retain a backup digital copy of vital documents in a password-protected cloud account, in case of loss or emergencies during your journey.
Navigating the Airport
Move through the airport efficiently by reviewing a map of the terminal before leaving home. Familiarize yourself with the locations of check-in counters, security checkpoints, gates, restrooms, and amenities. If your flight includes a layover, check the layouts for all relevant airports to plan connection routes and walking times.
Proceed directly to the check-in area if you haven't used online check-in. Staff at airline counters can print boarding passes and handle baggage drop. For self-service, use kiosks to avoid lines during high-traffic periods. Automated bag drops may also be present at larger airports.
Present your documents for security screening, where agents check government-issued IDs and boarding passes. Place electronics, liquids, and metal items in trays for inspection following TSA guidelines. Keep shoes, belts, and jackets simple to make removal and redressing quicker at security.
Find your gate after clearing security. Digital screens and mobile apps display real-time gate assignments and boarding times. Gate numbers sometimes change with operational updates, so check screens frequently and listen to airport announcements.
Locate nearby amenities using airport signage. Hydration stations, charging points, rest areas, and food options surround most gate areas. Refill water bottles after passing through security since TSA restricts liquids over 3.4 ounces in carry-ons.
Monitor boarding announcements as departure time approaches. Boarding occurs in groups as shown on your pass. Have your documents ready for gate agents and follow posted instructions for seat assignments and carry-on storage.
Ask airport staff for directions if uncertain about paths or procedures. They assist with wayfinding and answer questions about services or connections. Pick up an airport information guide if available, which lists facilities and maps all terminals.
Stay mindful of connecting flight times during layovers. Move promptly between gates, especially when passing through additional security or customs for international transfers. Electronic displays show real-time information on departing flights and connections.
Relax in waiting areas or use airport lounges if access is permitted. Use this time to organize documents, charge devices, and prepare entertainment for your flight. For nervous travelers, quieter seating sections near gates often provide a less crowded environment.
|
Step |
Recommended Action |
|---|---|
|
Before Arrival |
Review airport map, organize documents |
|
Check-In |
Use self-service kiosks or airline counters |
|
Security Screening |
Follow TSA guidelines, prepare liquids/electronics |
|
Gate Location |
Confirm gate info on screens, monitor announcements |
|
Amenities |
Refill water, access restrooms, charging points |
|
Boarding Process |
Line up by group, have documents ready |
|
Staff Assistance |
Ask questions, use info desks, follow signage |
Arriving Early and Finding Your Way
Arriving early at the airport gives you time to handle check-in, security, and boarding without stress. For domestic flights, arrive 2 hours before departure. For international flights, 3 hours provides a buffer for lines and unexpected delays.
Checking in online 24 to 48 hours before your flight speeds up your airport entry. After arrival, head to the designated check-in area or use self-service kiosks if available. Keep all documents and your boarding pass accessible, since you'll present them at multiple checkpoints.
Familiarizing yourself with the airport layout before departure helps you move quickly once inside. Review airport maps to identify your airline’s check-in counters, security checkpoints, and departure gates. Major airports publish digital terminal maps on their official sites.
Following directional signs or digital boards, move directly to security after check-in. Security checks require your boarding pass, identification, and compliance with liquid and electronic device rules. Place all items in trays as instructed, and retrieve belongings promptly to keep the process efficient.
After security, locate your gate by reading terminal screens. Gates may change, so check displays often until boarding starts. If you have time, use airport amenities like hydration stations or charging outlets near your gate.
If you feel lost or unsure, approach airport staff for clear directions. Staff assist with wayfinding and provide information about delays, gate changes, or amenities. For first-time flyers, asking questions ensures a smoother experience.
Tips for Security Screening
Presenting documents and preparing for screening ensures a smooth airport security process. Keep your government-issued ID and boarding pass in hand as you approach the security checkpoint. Wait until you reach the front before handing your documents to the TSA agent.
Packing your carry-on according to the 3-1-1 rule for liquids minimizes delays. Place liquids, gels, and aerosols in containers no larger than 3.4 ounces and store them in a single clear, quart-sized bag. Place this bag on top of your other items for easy access.
Wearing shoes that are easy to remove speeds up security lines. Slip-on shoes or sandals provide convenience as you’ll need to take them off before stepping through the scanner.
Emptying pockets and removing extra layers prevents added screening time. Set aside belts, metal jewelry, coins, or bulky jackets before you reach the conveyor belt. Pull out electronics like laptops and tablets and place them in a separate bin as required by most U.S. airports.
Following posted directions at the X-ray machine helps avoid confusion. Stand on monitored foot placements and wait for security instructions. If an agent requests a pat-down because of bulky clothing or hairstyles, comply promptly to keep the process moving.
Utilizing TSA PreCheck or Global Entry lines could cut your wait time if you fly frequently. These programs allow you to keep shoes, belts, and light jackets on and leave electronics in your bag in dedicated lanes.
Checking the latest prohibited items list on the official TSA site ensures you’ll avoid security trouble. Review this list before packing to prevent having items confiscated at the checkpoint.
Organizing your items and staying attentive to instructions streamlines your security experience. If you approach each step prepared, you reduce wait times and travel-related stress.
Boarding and In-Flight Experience
Move to your boarding gate on time after clearing security, since boarding usually starts 30 to 60 minutes before departure. Confirm boarding group or zone numbers on your pass, because these determine when you line up and enter the aircraft. Listen for announcements about boarding groups and gate changes to avoid missing important updates.
Present your boarding pass and ID to staff at the gate, holding both items so staff can quickly scan and verify your information. Proceed onto the jet bridge when invited. Greet the crew at the cabin entrance for assistance if you're unsure about seat locations, stowing bags, or safety procedures.
Stow your carry-on bag in the overhead bin above your seat or under the seat in front, depending on bag size. Store personal items, such as a purse or laptop, within reach under the seat, because airline guidelines require clear aisles during boarding and takeoff.
Find your seat, secure your seat belt, and review the safety card located in the seatback pocket. Listen to crew safety instructions, since procedures may differ between airlines and aircraft types. Set devices to airplane mode and fasten your belt low and tight across your lap.
Expect normal in-flight experiences like engine noise, air turbulence, and changes in altitude. Understand that these technical features don't impact aircraft safety—turbulence occurs frequently and is managed by pilots. Notify a flight attendant if you feel uneasy or need reassurance.
Stay comfortable during the flight by wearing loose clothing, drinking water regularly, and stretching your legs and feet while seated. Use the call button to request water or ask questions if you're unsure about any part of the in-flight experience. Bring snacks and entertainment if your flight doesn’t provide them, as most domestic flights don't include complimentary meals on trips under four hours.
Monitor cabin crew for announcements about landing and safety requirements. Secure all items, stow personal electronics, and fasten your belt as instructed. Remain seated until the crew turns off the seat belt sign, since standing before the aircraft reaches the gate is not permitted.
Boarding and in-flight moments often produce anxiety for first-time flyers. Focus on deep, slow breathing or visual cues, use distractions such as music or movies, and speak with flight attendants for extra support.
Understanding the Boarding Process
Check your boarding pass for the designated boarding group or zone, as airlines organize passengers by groups to board efficiently. Confirm your group number and listen for announcements to ensure you join the correct line. Present your boarding pass, whether digital or printed, along with your ID to the gate agent, who'll scan it before you enter the jetbridge.
Arrive at the gate at least 30 minutes before departure, since most airlines close the door 15 minutes prior to takeoff for on-time departures. Carry-on bags and personal items should be ready for quick stowing in overhead bins or under seats to avoid delays during boarding.
Quickly find your assigned seat, store your carry-on in the bin directly above your row, and keep personal items under the seat in front of you. If you need help with luggage or seat location, ask a flight attendant for assistance. Once seated, fasten your seatbelt and switch electronic devices to airplane mode.
Listen for safety announcements and review the safety card in your seat pocket. Be prepared for possible noise or vibrations as boarding concludes, especially while cabin crew secure doors and conduct final checks. Remain seated until the aircraft taxis away from the gate, and follow crew instructions at all times during the boarding process.
Comfort and Etiquette During the Flight
Seat comfort impacts your flying experience more than any other single factor. Choose an aisle seat for easier access to the restroom or a window seat for added privacy. Adjust your seatbelt low across your hips and recline only when appropriate, being mindful of the passenger behind you.
Personal space etiquette in the cabin increases everyone's comfort. Store bags in the overhead bin or beneath the seat in front of you, not in a neighbor's space. Avoid encroaching on shared armrests and keep your legs out of aisles.
Noise levels on flights stay high, especially during takeoff and landing. Use noise-canceling headphones, watch movies, or listen to music at a moderate volume. Speak softly when talking to seatmates. Cabin shaking and engine sounds are normal features of flight.
Hydration remains key to staying comfortable in dry cabin air. Drink water regularly and avoid caffeine or alcohol, which can increase dehydration and anxiety levels. Pack a refillable bottle to fill after security.
Movement helps circulation during the flight. Get up and stretch or walk the aisle every hour, if allowed. An aisle seat makes this easier, especially on longer flights.
Dressing for rest pays off. Wear layered, loose clothing and bring a light sweater. Airplane cabins fluctuate between cold and warm, so adaptable options keep you comfortable from gate to gate.
Politeness toward fellow travelers and crew enhances the overall atmosphere. Greet cabin crew, use "please" and "thank you," and comply with instructions quickly. Notify crew privately if you need special help.
Cabin cleanliness etiquette prevents issues. Use provided wipes for tray tables and armrests. Collect your trash throughout the flight and hand it to crew when offered. Avoid applying strong fragrances or eating food with a strong odor onboard.
Cabin comfort and proper etiquette directly affect both your in-flight experience and the journey for others. By maintaining awareness and consideration, you'll travel more comfortably and help create a more pleasant cabin atmosphere.
Staying Calm and Managing Anxiety
Practicing controlled breathing calms nerves on a first flight. Slow, deep breaths lower your heart rate and occupy your mind. Count every inhale and exhale; this method reduces stress according to meditation studies.
Visualizing peaceful scenes distracts from flight anxiety. Close your eyes and picture detailed environments like quiet beaches or gardens. Image each sound, sight, and scent to create a calming mental escape when anxiety rises.
Limiting caffeine intake prevents increased jitteriness. Avoid caffeinated drinks before your flight, since they can raise heart rate and worsen anxious feelings, especially in new or crowded situations.
Packing distractions eases nervousness during takeoff and landing. Bring entertainment like books, music, or puzzles to keep your mind engaged and focused away from worry.
Communicating with flight attendants increases comfort. Ask questions or share concerns if you feel uneasy; experienced crew can explain noises or offer calming support during turbulence.
Watching cockpit or airline operation videos builds familiarity. View short, reputable clips online to demystify flight procedures and safety, preparing you mentally for normal in-flight sensations.
Understanding that turbulence and aircraft noises are common helps manage expectations. Commercial aviation remains the safest form of transportation in the U.S. (USAFacts, 2024), so expect routine bumps or mechanical sounds without alarm.
Using these strategies together optimizes calm for your first time flying and supports an enjoyable journey from takeoff to landing.
Deboarding and Collecting Luggage
Deboarding procedures help streamline your exit from the aircraft. Flight attendants announce when to unbuckle seat belts and stand, so remain seated until this signal. Overhead bins can shift during flight, so handle bags carefully when retrieving them to prevent injury or damage.
Airport signs direct you to baggage claim after leaving the aircraft. Follow “Baggage Claim” or “Arrivals” signs and reference airport maps, which are usually posted near the gates. If you have a connecting flight, pay attention to signage for "Flight Connections" instead of heading to baggage claim.
Baggage carousels display flight numbers on screens above or beside each belt. Wait until your flight number appears, then collect your checked luggage as it emerges. Most airports in the US deliver baggage within 15 to 30 minutes after arrival, though busy periods may increase wait times.
Inspect your bag’s tag and appearance, since many suitcases look similar. Baggage claim areas often provide luggage carts for convenience; these may require a small fee.
If your suitcase doesn’t arrive or is damaged, go immediately to the airline’s lost luggage counter in the baggage claim hall. Airline representatives use your baggage claim tag (received at check-in) to assist in locating or reporting missing or damaged items. Around 6 bags per 1,000 are mishandled globally (SITA, 2023), but most misplaced luggage is recovered within 72 hours.
Confirm all your belongings before exiting the baggage claim zone. Customs officers may inspect luggage for international arrivals, so keep your travel documents ready. Follow “Customs” signage and answer all questions truthfully.
Below is a reference table summarizing typical timelines and statistics for luggage collection:
|
Step |
Action |
Typical Time |
Notes |
|---|---|---|---|
|
Deboarding |
Remain seated until instructed |
5–15 minutes |
Rows released in order |
|
Walking to baggage claim |
Follow “Baggage Claim”/“Arrivals” signs |
5–10 minutes |
Distance depends on airport layout |
|
Waiting for luggage |
Collect from assigned carousel |
15–30 minutes |
May extend during peak travel |
|
Reporting missing/damaged bags |
Visit airline desk with claim tag |
10–30 minutes |
6 per 1,000 bags mishandled globally |
|
Passing customs (international) |
Present documents, declare goods |
2–20 minutes |
Times vary by airport and passenger flow |
Staying alert and following signage ensures you reach baggage claim smoothly, collect your luggage promptly, and exit the airport ready to continue your journey.
Navigating the Arrival Airport
Check arrival signs and screens immediately after leaving the aircraft, as they display baggage claim locations, customs instructions, and connecting flight gates. Follow floor markings and clear signage through corridors or jet bridges, leading you toward border control or the baggage claim area.
Present your travel documents at immigration for international arrivals, when officers request your passport, visa, and arrival card. For domestic flights, bypass immigration and proceed directly to the baggage hall or exit.
Retrieve checked luggage at the assigned carousel by matching your bag’s tag or description, remaining near the correct belt displayed with your flight number. In case your bag is missing or damaged, report the issue at the designated service counter before exiting the area.
Proceed through customs by choosing the appropriate lane for your declaration status, when required by your arrival country’s customs regulations. Keep completed forms and purchased items receipts easily accessible.
Exit the arrivals area by following exit or transport signs, whether you use public transit, taxis, or meet prearranged transport services. Access airport amenities such as information desks, Wi-Fi setup zones, and baggage services if you’re waiting for ground transport or navigation assistance.
Plan your onward journey from the airport by researching ground transit options before arrival, as major international airports typically connect to city transit or ride-share zones. If connecting to another flight, check airport terminal maps for shuttle or walkway routes to avoid delays between gates.
Stay alert to announcements and digital display updates, especially when connections, gate changes, or unexpected procedures occur. Seek help from airport staff or information kiosks for first-time flyers when directional clarity or support is needed.
Conclusion
Your first flight is a big step and it’s normal to feel a mix of excitement and nerves. With the right preparation and a positive mindset you’ll find that air travel is much more manageable than it might seem at first.
Trust yourself to follow the steps you’ve learned and don’t hesitate to ask for help along the way. Every journey makes you more confident and soon flying will feel like second nature. Safe travels and enjoy your adventure ahead!


